
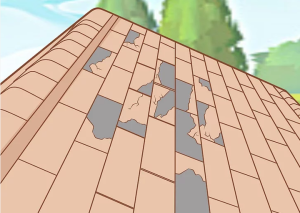
In the aftermath of a natural disaster such as a severe storm, your roof can spring a leak or get damaged and it is important to rectify it immediately.
If your roof does get damaged during a storm, you can prevent further damage by temporarily protecting your home with an ARK Industrial Strength Tarp. This will be a temporary fix until you can make arrangements for permanent repairs.
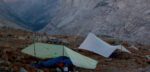
Check out this step-by-step instruction on how to tarp a roof.
What you need:

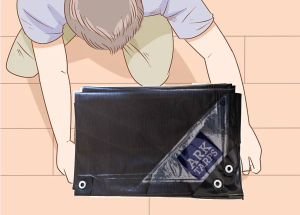
- ARK Industrial Strength Tarp – Made with a specialised Swiss-patented technology makes the tarp 100% waterproof, very strong yet lightweight and hence making it an ideal tarp to use when tarping the roof.
- Sturdy Ladder
- 6 wooden 2×4 Planks (each as long as the tarp’s width)
- Nails
- Hammer
- Work Boots, Thick Gloves, Safety Goggles, Helmet and High Visibility Vest
Warnings:
- Do not attempt to install a roof tarp during dangerous, wet or windy weather.
- Call for professional help if your roof has a steep pitch, because you could fall.
- Call for professional help if at any point you are not comfortable with the installation on your own.
- Roof tarps will be slippery so don’t step on them.
- Repairing a roof can be dangerous. If you’re certain you want to repair the roof instead of a professional you need to have all the appropriate equipment. A sturdy pair of boots, thick gloves, a firm ladder, protective glasses, a helmet, and a high visibility vest are all essentials.
- Installation is a lot easier if you have an extra pair of hands, so call a mate.
- ARK Tarps recommends to always use professional help when dealing with tarping a roof.
Disclaimers:
- ARK Tarps recommends to always use professional help when dealing with tarping a roof. If you would still like to tarp your own roof, then please follow safety instructions and warnings, and use this as a guide only.
- A roof tarp is a temporary fix to damage in the roof. Once you have applied the tarp, make plans to get a permanent fix for your roof.
- The tarps are not indestructible and if they are exposed to strains beyond their capacities they will tear or get damaged.
- This guide does not provide any guarantees of performance. The performance of each tarp varies in accordance with the use and type of install.
- Under no circumstances will ARK Tarps be held responsible or liable in any way for any claims, damages, losses, injuries, expenses, costs or liabilities whatsoever (including, without limitation, any direct or indirect damages for loss of profits, business interruption or loss of information or life) resulting or arising directly or indirectly from your use of our products or from your reliance on the information and material on our website, this guide or product insert, even if ARK Tarps has been advised of the possibility of such damages in advance. By using our website or this guide, you hereby consent to the above
Follow this guide to install a roof tarp:
Repairing a roof is dangerous, if you are certain that you want to repair the roof by yourself instead of calling for professional help, please follow safety instructions and warnings at all times, and use the below as a guide only.
Step 1
Use a sturdy ladder to climb up to the roof and find the point of damage on the roof. If your roof is too steep to stand on, call for professional help.
Step 2
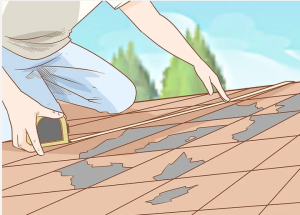
Carefully get on the roof if you can and measure the size of the damage.
Step 3
Purchase the ARK Industrial Strength Tarp. Generally, its better to make sure that the tarp is bigger than what you need, instead of falling short.

Step 4
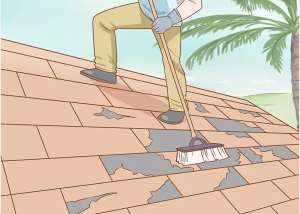
Using a brush, or broom, clear the debris on the roof. You want to remove all branches, leaves, and debris so that the roof is completely clear.
Step 5
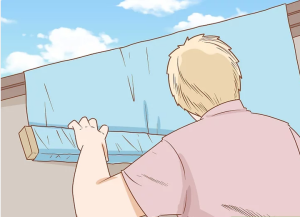
Unroll the ARK Industrial Strength Tarp. Remember, tarps can be hard to manage, especially on a windy day. Take the tarp out of its packaging, grab one end and have your mate grab the other end and carefully walk away from each other and the tarp will unroll.
Step 6
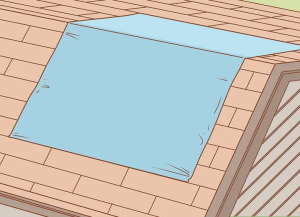
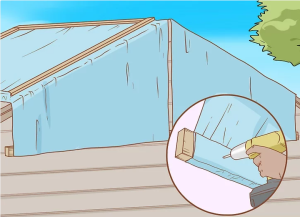
Lay the tarp out flat over the roof so that at least 1.2 m lies on the sloped part of your roof on each side (known as the ‘Peak’). Let the rest of the tarp hang off the lower border of the roof that overhangs the wall (known as the ‘Eave’) – Never lay the tarp out during a storm. Never walk on the tarp.
Step 7
If you have vents over your roof, its probably not a good idea to cover them as the air won’t be able to escape. You can either lay the tarp around these vents or cut out holes in a tarp to let the vents breathe.
Step 8
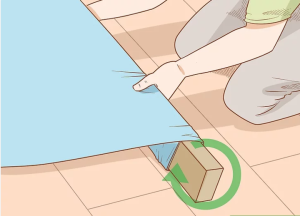
Secure 4 2×4 (38 x 89mm) boards with a drill to the peak ends of the tarp. The four edges are the peak ends. Lay a 2×4 board under one of these ends. Make sure at least 2 feet (0.61 m) sticks out to the side. Then, attach the tarp and board by hammering cap nails through the tarp and into the board underneath – Repeat this process 3 more times so that all the peak ends of the tarp have a board attached underneath them.

Step 9
Wrap the tarp around the boards underneath so they’re covered on all sides. Lift the board from underneath and rotate it counter-clockwise. Once the tarp has covered all sides, lay it down on the roof again. Repeat this process for each wooden board
Step 10
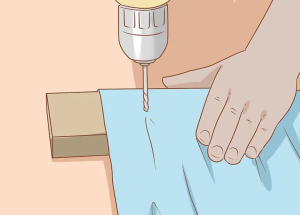
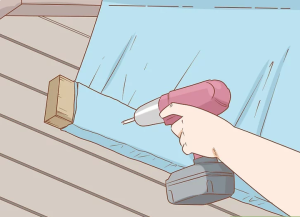
Choose 6 equally spaced spots on each 2×4 board. Then, with a drill, screw in long screws. Make sure the screw goes through the tarp, then the wooden board, and into the roof. Repeat this process for all the boards.
Step 11
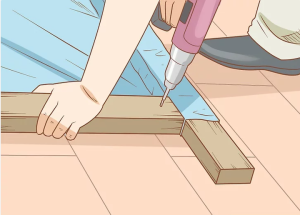
Lay 4 more 2×4 (38 x 89mm) perpendicular boards and screw them in. Lay the board flat on the roof. Place the short end of this board against the long side of the screwed in boards. Make sure the new board is over the tarp. The new board should be perpendicular to the old board. Then, choose 6 equally spaced spots on the board and screw in 2 inches (5.1 cm) screws with a drill. Make sure the screw goes through the tarp, then the wooden board, and into the roof.
Steps 12 to 14 are only applicable if you have the tarp overhanging.
Step 12
Attach 2 2×4 (38 x 89mm) boards with a drill under the overhang of the tarp. With the peak section secured, you need to secure the overhang. Bring the overhang onto the roof so you have a solid surface to work on. Then, put a 2×4 (38 x 89mm) wooden board under each side, making sure 2 feet (0.61 m) of the board is sticking out of the side. Attach the boards to the tarp by using cap nails.
Step 13
Roll the tarp’s overhang under the eave and screw it in. Roll the tarp back off the eave so that it’s hanging off. Then, wrap the 2×4 (38 x 89mm) wooden boards counter-clockwise so the tarp wraps around them. Place the boards tight against the base of the eave. If there’s any slack in the tarp, keep wrapping the boards. Then, screw the boards and tarp into the wall using screws
Step 14
Screw more 2×4 (38 x 89mm) wooden boards onto the tarp where necessary. The boards that are attaching the tarp to the roof are known as ‘anchor boards’. If you feel that the anchor boards aren’t enough to secure the tarp to the roof, or you see some areas that are loose, you should act. Lay as many 2×4 (38 x 89mm) wooden boards across the tarp as you see necessary and screw them in with screws

 No products in the cart.